Proper removal of your enhancement, weather it be gel, acrylic, or gel polish, is vital to the health of your natural nail. These enhancements are adhered to your natural nail, and if not removed properly they could leave behind less nail than what you started with.
If you've been keeping up on this series of posts, you know that I always recommend going to a reputable salon to get your enhancement removed. It is safer, and easier on your natural nail. If you're in a bind, or can't get to someone, I have posted some general guidelines to help you with your enhancement removal at home.
As you know, Gel is a different enhancement than acrylic. If they applied anything with a liquid and powder, this is not gel! Read more about this on my FAQ. Removing gel nails at home is even more tricky than removal of acrylic. Almost all gel nails are not soluble! Meaning nothing is going to break it down. If you've ever tried to remove gel nails by soaking in acetone, you know that it doesn't work! Anyways, lets get on with it:
Things you'll need:
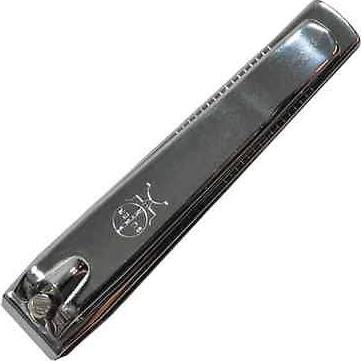
- Toenail clippers
- A 150 grit nail file
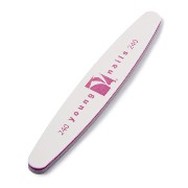
- A 240 grit nail file
- 30-60 minutes
| 
| 
|
Step 1: Clip the length of the nail just past the end of your finger. One clip with the toenail clippers on the edge of the enhancement should take the entire extension off. If not, clip the other side and gently remove the length of the nail.
Step 2: Gently use the nail file to thin out the bulk of the nail by using gentle back and forth motions on the top of the enhancement. Don't use pressure! Let the file do the work. One of the great benefits of gel is it files a lot easier than acrylic. You will notice that it doesn't take much time to thin the enhancement.
Step 3: If you can stand it, leave a thin layer of the gel on your nails. There are a few reasons for doing this.
I have a new system called IBX that is a wonderful strengthening treatment after removal of an enhancement, or if you have really thin natural nails. I am adding this to all my removal services, so there is another reason to save yourself some time, and get them removed by a professional.
Once you're done removing the enhancement, I would recommend using a good quality cuticle oil to rehydrate your nail and the skin surrounding your nail. Also, a strengthening polish is a good idea. I recommend O.P.I's Nail Envy.
If you have questions, don't hesitate to call me.
Step 2: Gently use the nail file to thin out the bulk of the nail by using gentle back and forth motions on the top of the enhancement. Don't use pressure! Let the file do the work. One of the great benefits of gel is it files a lot easier than acrylic. You will notice that it doesn't take much time to thin the enhancement.
Step 3: If you can stand it, leave a thin layer of the gel on your nails. There are a few reasons for doing this.
- It'll help avoid doing damage to your natural nail with the file.
- You will still have a little bit of strength.
I have a new system called IBX that is a wonderful strengthening treatment after removal of an enhancement, or if you have really thin natural nails. I am adding this to all my removal services, so there is another reason to save yourself some time, and get them removed by a professional.
Once you're done removing the enhancement, I would recommend using a good quality cuticle oil to rehydrate your nail and the skin surrounding your nail. Also, a strengthening polish is a good idea. I recommend O.P.I's Nail Envy.
If you have questions, don't hesitate to call me.

 RSS Feed
